Sunday, November 6, 2016

Making a Complete Sentence

We spent most of the first quarter learning about writing sentences.  One of the key things the children have to understand is what makes a complete sentence.  I've found one of the most effective ways to get this concept across to the children is to tell them a sentence is made up of two parts, a who part, and a what part.  For the sake of not confusing first graders, I don't distinguish between people and animals and other inanimate objects as the who in a sentence.

We spend several weeks looking at various sentences and identifying the who and what part of each sentence to makes sure they are complete sentences.  When we do group writing, I often will put just one part or the other of the sentence and have them tell me whether or not it's a complete sentence and why it is or is not a complete sentence.

I also provide lots of opportunities for the children to write in complete sentences by providing a daily writing prompt in our morning work time and having the children respond in sentences.  When I check their writing, if I see a child only has a phrase, I'll ask them to apply the test.  For instance, if the prompt was what is your favorite pet, and they write "my dog," I'll ask them who.  They will respond "my dog."  Then I will say "what," and they realize that there is no what part of the sentence. So after they tell me "what," they go back and rewrite their sentence to make it a complete sentence.

After practicing this for around three to four weeks, I'm ready to let the children work on making compete sentences independently.  I use the free resource that I created for my store, Fall Subject Predicate Sentence Puzzles, as an independent center.
                         

 I use the sentence recording sheet as a formative assessment to judge whether or not they understand that sentences have two parts, the who and the what part.  If they can correctly color the who and what part of the sentences, they understand the concept.  If they have trouble distinguishing between the who and what part of the sentences, they need more instruction on the concept.

If you would like to try out this resource in your classroom, click on any of the pictures above to visit my store and download it for free!
I've joined up with many other sellers to bring you some wonderful freebies to help you with your fall planning.  Check out the link up below to see all the great resources available!

Be sure to enter the Rafflecopter for TpT giftcard giveaways as well!

An InLinkz Link-up


Thanks for stopping by!
a Rafflecopter giveaway

Tuesday, October 18, 2016

Halloween Sight Word Practice

Halloween Sight Word Practice

Add a little Halloween fun to your sight word practice!  Two great stories that use repeated text and high frequency words can be found in the Hameray Publishing catalog.

With repeated sentence structure and picture support for the word that changes in each sentence, Halloween Night is a fun and easy read for your beginning readers. 


If you're looking for a little bit more of a challenge, Joy Cowley's Spooky House is a good choice. Two children approach a haunted house, becoming progressively more frightened as they move deeper into the house.  Finally, they see and hear something that causes them to turn tail and run, all the while convincing themselves that they are very brave.
 
As you can see, there are many sight words included in both books.  The repetitive text makes it easy for even your approaching level readers to pick up the rhythm of the words.

A fun follow up activity is to play Read-the-Room Halloween Style. 

                                             
It's a simple game to play with your whole class, or you can set it up as center.  Simply take the numbered cards and place them around the room.


Place the sight word cards in a pocket chart or display on the board for the children to refer to while they read the room.  They will copy the word onto their answer sheet that complete the sentence on their card as they move from card to card.
                         
You can find this FREE resource by clicking on any of the above pictures of the resource.


So take advantage of the excitement of Halloween and the abundance of great Halloween stories to squeeze in some fun Halloween themed sight word practice!

Thursday, September 29, 2016

Why Do Leaves Change Colors?

Now that fall has arrived (finally!), and the leaves are changing colors on the trees, it's time for my annual science lesson on leaves changing colors.

Through the years, I've found two good mentor texts to use that address this concept.  Both are from Scholastic Books, and both do a great job taking a complex subject and bringing it down to an elementary level of understanding.


Both books simply introduce the children to the life cycle of a leaf, from a bud in winter, to a new leaf in spring, to a mature leaf in summer, and then a fall leaf, changing color and falling off the tree.

They also introduce the children to the job of a leaf, which is to take air, water, and sunlight, mix it with chlorophyll, and make tree food!  There is not a long, complex explanation of all the chemistry involved -- we can save that for later on in their educational career -- but just an elementary level explanation of the job of a leaf.

The books talk about how the chlorophyll the leaf uses to make tree food is green, and it covers up the natural color of the leaf.  I use my shirt and pants as an example.  I show them where my shirt has covered up my pants, so they only see the color of my shirt.  But when I lift my shirt, when my shirt goes away, they can see the actual color of my pants.

It's the same with the chlorophyll in the plants.  When fall comes, and there is less sunlight in a day, the leaves know it is time to stop making plant food.  The chlorophyll is not needed anymore, and gradually the green color goes away, letting the golds and yellows and reds and oranges of the leaves show.

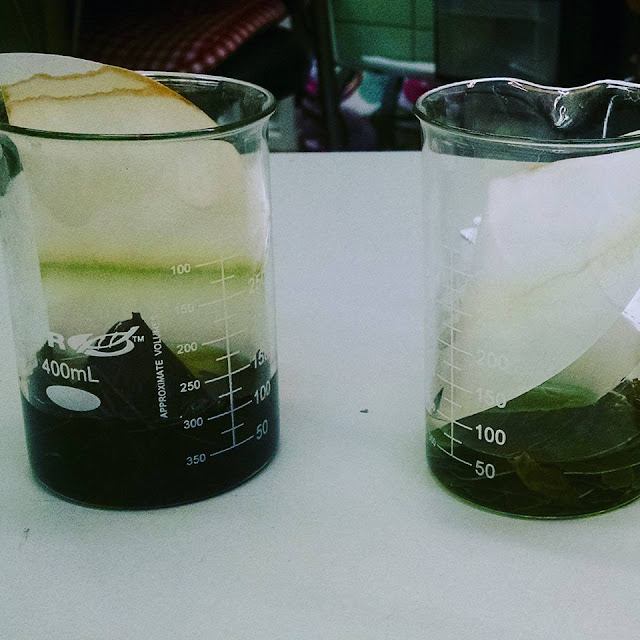
Then we do a science experiment using rubbing alcohol, coffee filters, and crushed up leaves.  The children each bring a leaf in to school.  The children draw a picture of their leaf on their experiment recording sheet.
Then I put a bit of rubbing alcohol in each jar. I stop there, and the children record this step in the "first" box.

We sort the leaves out by their colors and tear and crush the leaves up and put them in a glass jar.   I make sure the rubbing alcohol covers the leaves, cut the filter into strips, then place the strips in the glass jars.  The children then record this step on their sheets.

At first glance, it will appear as if your experiment failed because, while the rubbing alcohol will get sucked up by the coffee filter, no colors will appear.  But if you leave it sit for a few hours (we leave ours sit overnight), as the rubbing alcohol dried, the colors that were separated out of the leaves will appear.  

The children record this on their sheets as well.


Then, using my resource, 


they put all the information into their science notebooks.


The children are always excited when we do this lesson, and they love sharing this information with their families, impressing them with their knowledge of chlorophyll and how leaves change colors in the fall.

Exciting news!  We are bringing back Freaky Friday for October, with a special sneak preview on Friday, September 30.  Click on the picture below or check out the link-up to see over 40 $1 deals.  Be sure to check back each Friday in October to see what deals we have for you!


Wednesday, August 31, 2016

Mini Lessons using Morning Work booklets

Today I'm going to share with you how I use my morning work resource.
click here to view the complete bundle.

This is a 30-week series that will take you through the school year.  I usually start it with my students the day we come back after Labor Day.  By then, they are becoming familiar with the rules and routines of school and are ready to start focusing on the academic aspects.  I start off by making this the first thing we do together in the morning for the first few weeks so they get the idea of how to do the work.  It should only take about 10-15 minutes in the morning.  Once they have the idea of the routine of the morning work, I set it up for them to do independently when they arrive at school in the morning.  This is where the mini-lessons come in.

After doing the work independently, we check the work together.  I project it onto the SMARTBoard, and write in the correct answers.  The children check their own work, fixing errors as necessary.  I believe this is an important part of the process because if I correct their error, it will mean nothing to them.  But if they correct their own errors, it is more likely to be meaningful to them, and they will remember not to repeat their mistake the next time.  In theory...but that's a post for a different day.

As we correct the work, I choose one thing to spend a few extra minutes on. I try to choose a different area each day of the week.  So  Monday, I might choose to focus on capitalization at the beginning of a sentence, Tuesday the focus might be phonics, Wednesday the focus might be numbers from 1-120, Thursday the focus might be adding basic facts, and Friday, the focus is always on responding to a writing prompt.  On this day, I will write my own response to whatever the prompt of the day was, and we will discuss main idea, responding to the prompt, and as the year progresses, adding detail sentences and a conclusion. Following this procedure last year, I saw a great increase in the effectiveness of my students' writing ability.

Each mini-lesson gives me the opportunity to focus on a skill, and the skills gradually spiral up to the next level.  It is a great way to work more curriculum-based practice into our daily routine.  I spent some time looking at other morning work series out there, but none of them were quite what I wanted, so I designed my own.  Hopefully it will fit your needs, too.

You can try the first week for free.  Just click on the picture below and download it.

Thanks for checking in!  

Friday, August 26, 2016

The Great Guided Readers Giveaway!

Hey, friends, I'm back again with a great way for you to get age appropriate guiding reading materials in your hands for your emergent readers!  My friends over at Hameray Publishing (you know, of Mrs. Wishy-Washy fame) are giving away a set of high-interest  books perfect for small group instruction!  
Joy Cowley Early Birds Junior Set features Joy's "learning with laughter" writing style, made famous by the Mrs. Wishy-Washy books, in a totally new set of stories—new characters, new illustrators, and new fun ways to get your students excited about reading. Written at guided reading levels E–G, these books are perfect for welcoming your emergent readers back to school.
                                              

You can explore these titles and Hameray's other literacy materials here 

If you want to jump start your students' reading excitement, enter the giveaway by clicking on the picture below.
Click here to enter the giveaway of Joy Cowley Early Birds Guided Reading Complete Set 2


The giveaway will run from this Friday, August 26, 2016 until next Friday, September 2, 2016.  Good luck!!! 

Thursday, August 11, 2016

Take Your Students on a Reading Journey!


It's #ThankfulThursday! and have I got a deal for you!  Take your students on a reading journey this year with my supplemental skills workbook series.  Here's a quick overview of my series.


For my deal today, I am putting both my 1st semester bundle on sale for 50% off!  The feedback on these resources is excellent.  Teachers love them for the time saving and student engaging aspects of them.  Kids love them because they are fun and just challenging enough to keep them moving forward in the reading curriculum.
                                      

You can go to www.shoppracticemakesperfect.org to find these and other great reading resources, or click on either cover above to go straight to that resource.

Be sure to search #ThankfulThursday on www.teacherspayteachers.com to see other great bundle deals!


Monday, August 8, 2016

The End of Summer

The days are getting imperceptibly shorter.  Nights are getting slightly cooler, enough that the air doesn't kick on at night, and I can sleep with my window open again. Through my open window, I hear the steady cacophony of sound that foretells the end of summer. The crickets are serenading me full force at night. It is a bittersweet time of the year.  Long, hot, lazy days spent at the poolside, floating on my special raft and having the LUXURY of reading for pleasure without falling asleep 2 pages into my reading, cookouts, fires, and camping days are coming to an end.  That makes me sad. And yet . . . there's a certain excitement.  My class list and schedule have arrived in the mail.  My thoughts turn to name tags and desk tags, and classroom decorations.  I'm starting to feel antsy to get back into the classroom, get it organized, meet the new group, and get this party started!

If you're feeling anxious to get the party started (or your party already started), then you will want to be sure to check out the last Oceans of Steals and Deals this week.  Here's a listing of what's coming up.

So it's Monday, and you know what they means?  #ManicMonday!  

I will be offering my fabulous back-to-school resource, All About Me, for only $1.00. Check out this video highlighting the resource and the ways I use it in my classroom during the first week of school to get to know my students better.
                                       

Click here to visit shoppracticemakesperfect.org 

For my second item, you can get these colorful Rainbow Theme room decor, 2D and 3D shapes posters.  They will mesh with most existing room decors, or buy the complete bundle and make your room bright and colorful!


Be sure to check back on Tuesday to see what my 2 for Tuesday deals will be.  I think you're going to like them!

Click on the pictures below to see the other great #ManicMonday deals being offered.

Have a great day!

Wednesday, July 6, 2016

Only 171 More Days Until Christmas!


Did you know there's only 171 (or so) more days until Christmas!!??!!  That's less than half a year.
CHRISTMAS FREEBIE FOR 
PRACTICING ADDITION AND SUBTRACTION STRATEGIES
It’s never too late to think about Christmas activities!  Here’s a cute FREE math GAME for the children to play in those hectic weeks before Christmas break.  It's a great review because not only do children have to solve the addition problems, they need to identify the strategy they used to solve the problem.  It makes a great formative assessment to judge children's understanding of addition strategies!
 Click here to download Christmas Scoot
Click here to download Christmas Scoot


While you are visiting my store, be sure to check out my back to school activities.  One of the favorite activities I do with my firsties during the first week of school is my Read All About Me activity.  It's great to display on the walls for open house!  It also gives you the opportunity to learn a little bit about your firsties, and it covers skills in both math and language arts to make integration easy.  Since we always start school on a Wednesday, I pair the activity  with a book I inherited in my classroom called "All About Me," and it makes for a nice, integrated block of math and language arts before we jump into the curriculum during our first full week of school.


I hope you enjoy the rest of your summer!  May the hot, sunny days go slowly for you!!

    Tuesday, June 28, 2016

    Learning About Baptism in Primary Grades

    Hi everyone!  Today I want to highlight one of my Catholic religion resources.  I use this when I'm teaching about the Sacrament of Baptism.


    I begin the lesson by talking with the children about Baptisms they have been a part of, as many of them have younger cousins or brothers or sisters.  We talk about what they saw happening, what the priest used at the Baptism, what the parents said and did, et cetera.  As they mention things they saw said or done or used, I just jot them on the board.

    After we discuss what they already know about Baptism, we watch this short video of baby being baptized.


    When it is over, we take a few minutes to discuss, again, what they saw happening in the video.

    Then I go into explaining that Baptism is the first Sacrament (sign of God's love and life in us) that they received when they were babies.  I bring out my baby doll dressed in my daughter's baptismal dress, and we talk about what the baby is wearing (white) and why (sign of purity).  Then we take the baby doll and we perform a baptism in the classroom.  I act as the priest.  Two students get to be the parents, and two are the godparents.  Everyone else is the congregation.  I use the wording found on this PDF, but I do modify it fit the age and maturity of the children.  I bring a glass bowl to use as the baptismal font, water, and oil from home.  I put them in fancy salad dressing cruets to use during the Baptism.

    After we act out the baptism and, again, discuss the meaning of the ceremony and items used, I have the children draw a picture and add a caption about Baptism that I bind into a class Baptism book, All About Baptism.  This is also used as a formative assessment as it allows me to see how well each child understands Baptism.

    After we finish this piece of the lesson, I get out their religion interactive notebooks. This is always the last piece of our religion lessons.  As we read and add the pages to our notebooks, it is a good and lasting way to review what the children have learned during the week.


    We always begin each section with a title page.

    Then we work our way through reading and adding the content pages.


    I love using the interactive notebook portion because it creates a lasting reminder of each lesson we've learned in our religion class.  When I pass out the notebooks, I always give the children a few minutes to leaf through the notebook and talk about all the things we've learned.  We start with the creation story at the beginning of the year and just add to the notebook all year long.  Some things are not interactive per se.  They might be crafts that we've completed to represent various lessons, like Noah's Ark or Moses and the Burning Bush.  But each thing in the notebook sparks a memory of the lesson and brings the children closer to God as they grow in their faith.

    Today, as part of the #2forTuesday sale, you can find this resource in my store on sale for $2.00.  It includes vocabulary cards with words and pictures, the interactive notebook pages, a Baptism trace and color sheet, and a summative evaluation you can use at the end of the lesson or as a text dependent question sheet to go along with the interactive notebook.


    As a small freebie for you, you can download this trace and color sheet by clicking on the image.


    To view this resource in my store, you can click on the cover or any of the pictures from the interactive notebook.

    Be sure to visit the InLinkz below and see what other great items are being offered in the #2forTuesday sale!
     
    Blogging tips